Speed up your PowerPoint work by using our custom toolbar
Powerpoint has a lot of features. Some are obvious, but many of the most useful commands for lawyers are buried deep within panels and hard to find.
Perhaps the most useful feature in the software is not even turned on by default: the “Quick-Access Toolbar”. It allows you add your choice of commands to a toolbar that conveniently sits right above your workspace, no matter what panel you’re in.
Things like grouping, rotating, changing object order and color, aligning — these all can be done right from the toolbar, without right-clicking objects or navigating between subpanels.
We’ve put together some of our favorite commands we think are most useful for lawyers in this toolbar. Learn how to download and install it at the end of this article.
Here’s a quick walkthrough of the features we’ve added to our recommended toolbar:
Pick up Style and Apply Style
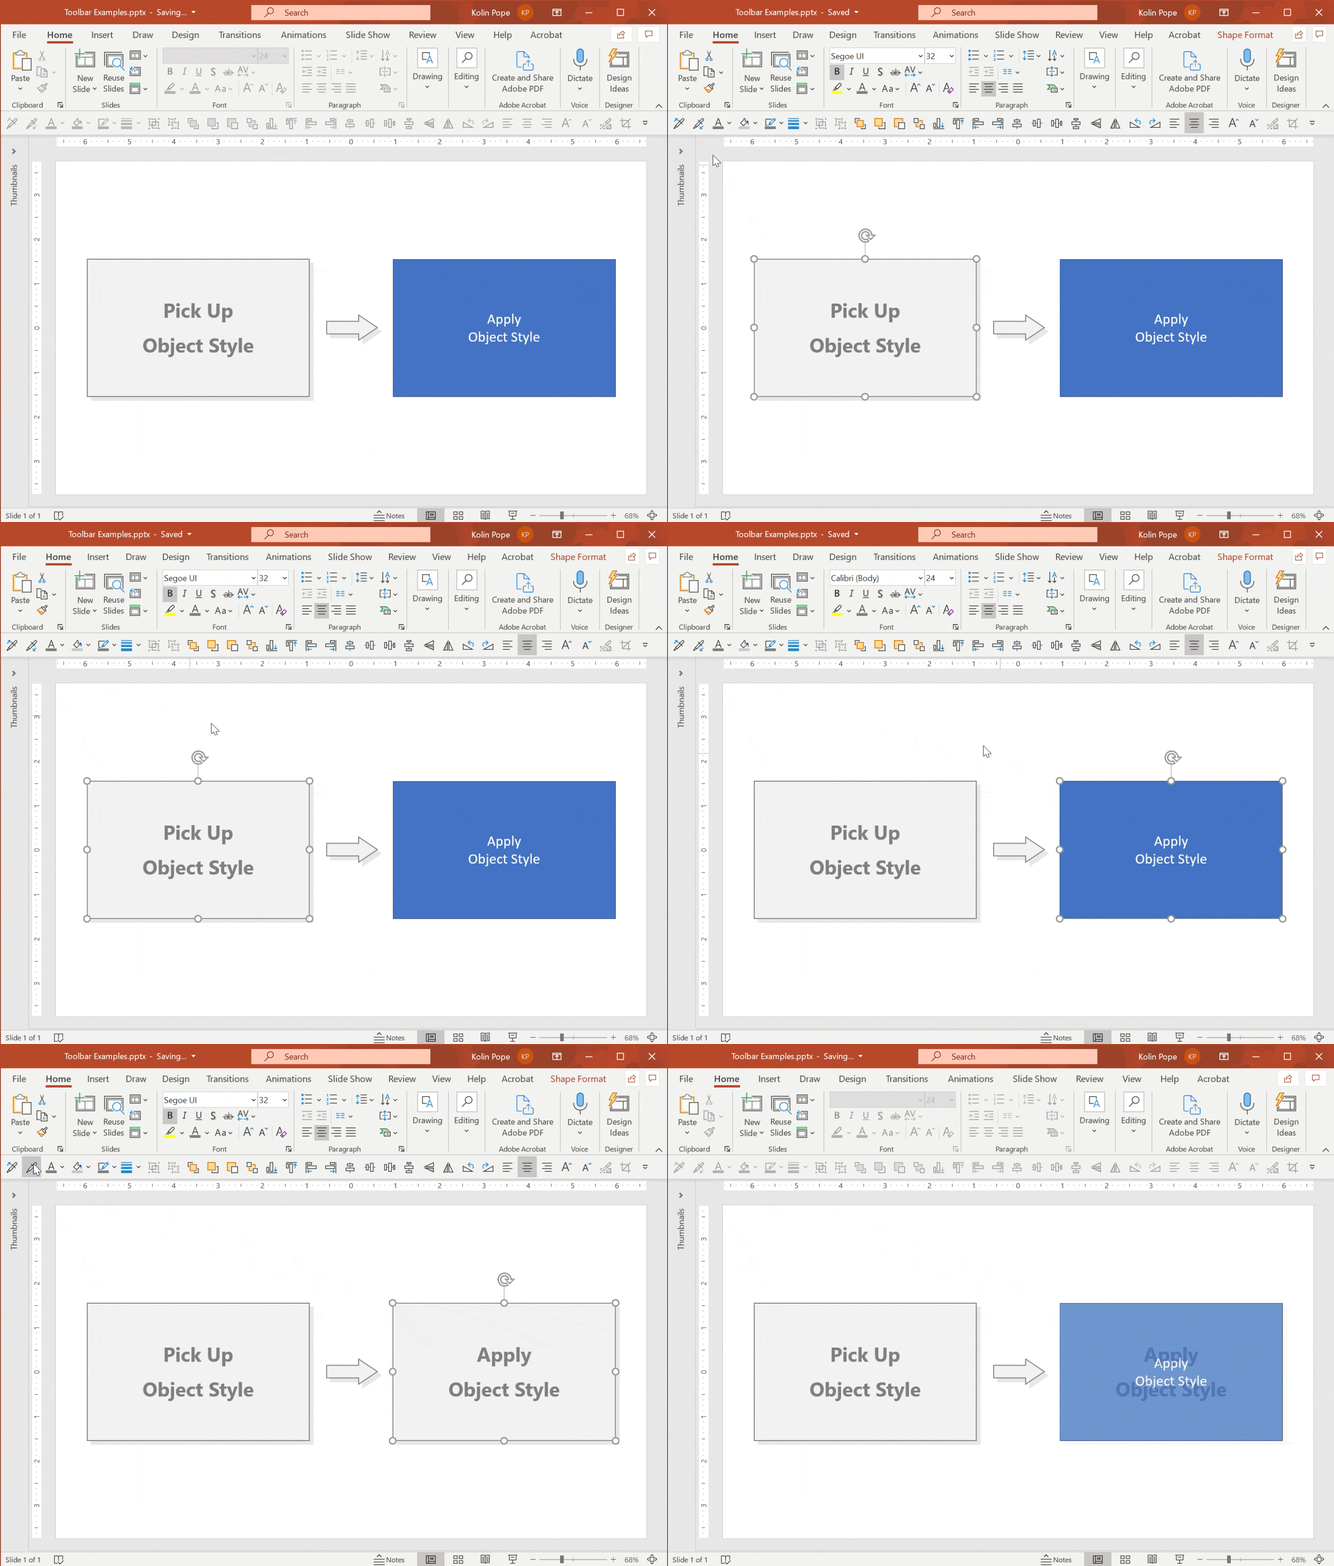
One of the most important and time-saving features hidden in PowerPoint is the ability to “pick up” a style from an object or type — shape color, line weight, font or type size, line spacing, shadows, and more — and then apply those styles on a different object to make it match. It’s truly a swiss army knife of a tool to help keep your deck consistent, and one of our most frequent go-tos.
In the example above, an object style is Picked Up from the source object, the destination object is selected, and then Apply Style is used to copy all the styling properties onto the destination object.
Adjust Colors and Lines
Next, we have four commonly-used controls to adjust type color, object fill color, line color, and line thickness.
Group and Ungroup
Quick access to grouping functions, helping to avoid the repeated right-clicking usually needed to group and ungroup.
Change order (Stacking)
Easy access to the four commands that change stacking order of objects: Bring to Front (bringing an object all the way forward), Bring Forward (bringing an object only a single layer forward), Send Backwards (sending an object a single layer backwards), and Send to Back (sending an object all the way to the back).
Alignment, Centering, and Distribution
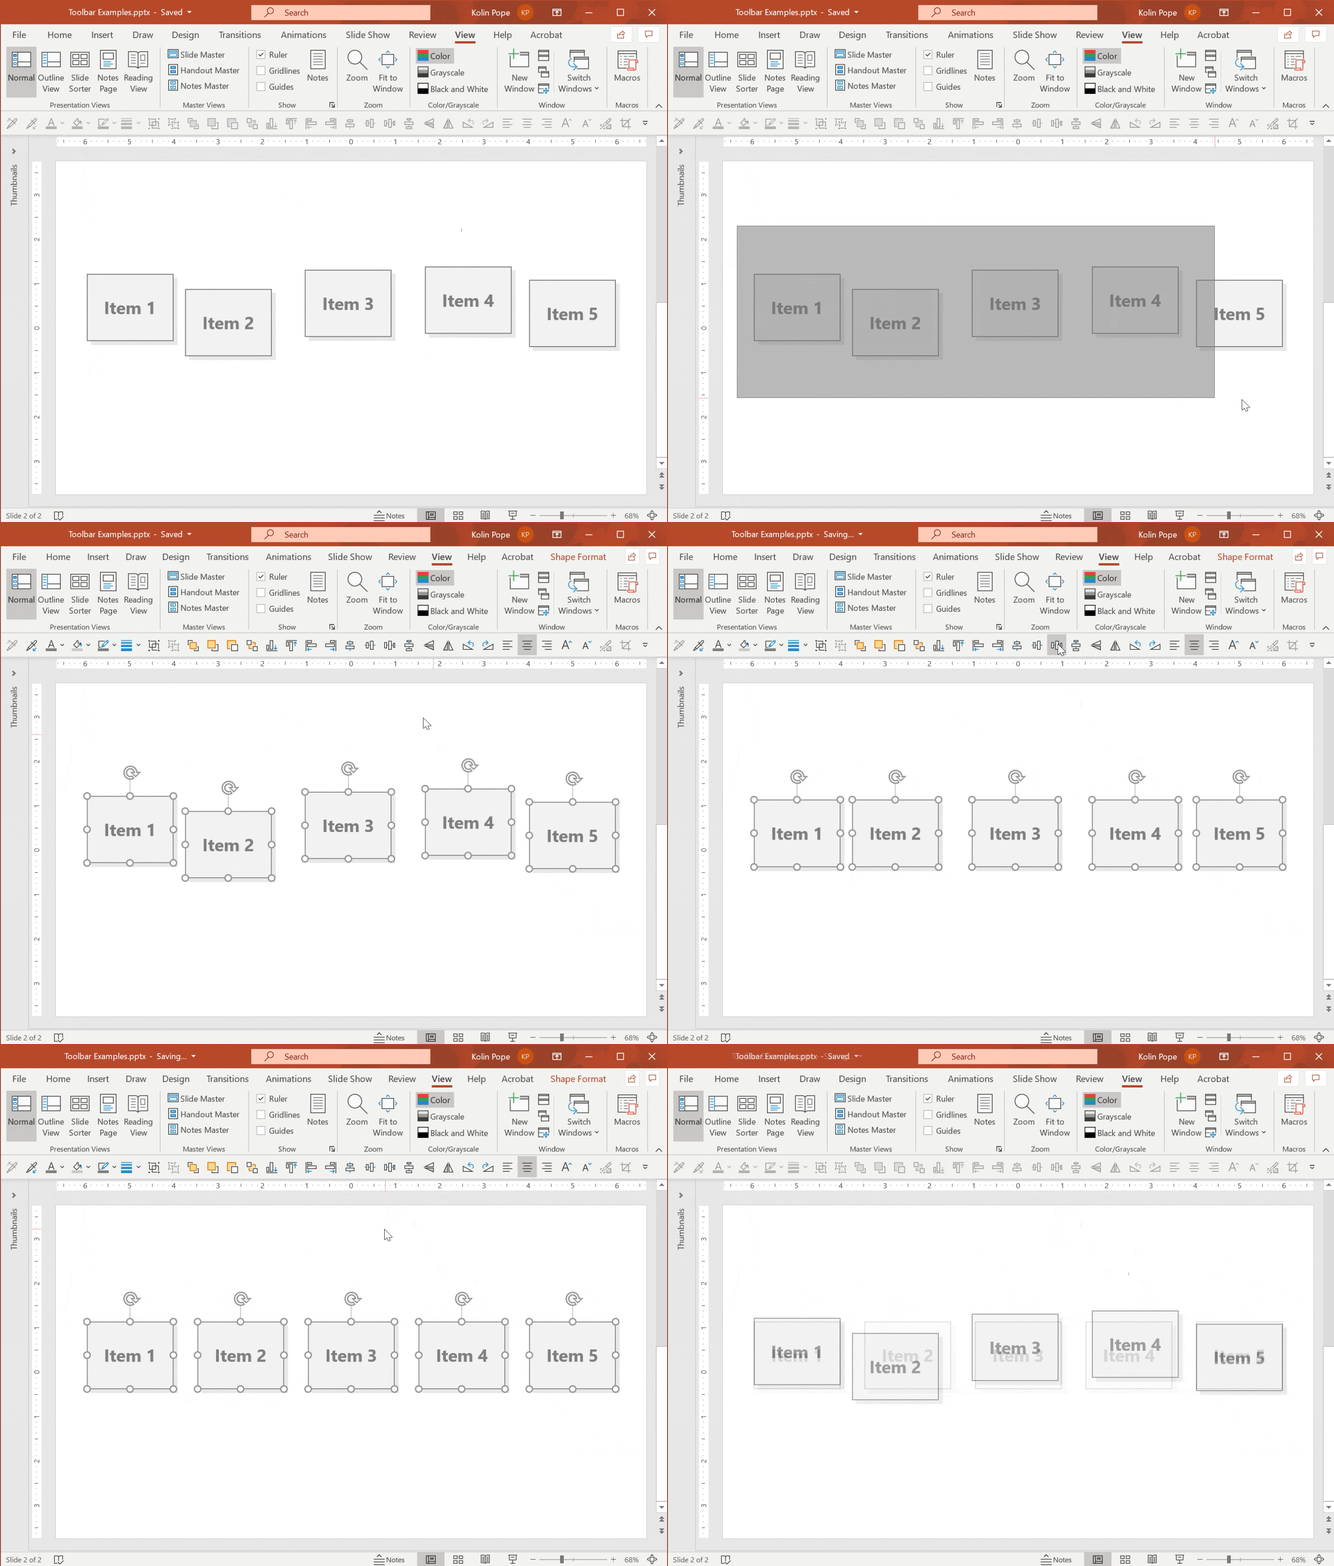
The alignment and distribution tools allow you to quickly snap groups of objects into relation with each other. Our toolbar begins with Align Bottom, Top, Left, and Right, which snap-align groups of objects to the edge chosen. They’re followed by by Align Objects Center (Vertically) and Align Objects Middle (Horizontal), which align shapes to a common center line. Distribute Horizontally and Distribute Vertically may be the least known of these tools: these functions space out a series of objects equally between the two furthest objects in the set.
In the example above, a group of objects is selected, followed by Align Objects Middle and then Distribute Horizontally, to bring the entire row into center alignment and then space them evenly.
Flip and Rotate
Next on our toolbar are commants to Flip (Mirror) Vertically and Flip (Mirror) Horizontally. Flip vertically and horizontally
Rotate clockwise and counterclockwise
Paragraph and Type size
Align type left, centered, and right
Increase and decrease font size
Set Transparent Color
Another hidden but incredibly effective tool, “Set Transparent Color” allows you to knock out the solid color background of an image, in order to let objects show through behind it — like highlighting. This feature requires the image to be reasonably good quality, however: if you attempt to use it on a grainy image like a poorly-scanned text document, you might notice it produces a lot of pixelated “artifacts” around the edges of the type, unable to cleanly find the edges.
Any changes made to an image using this tool can be reset by going to the Picture Format tab on the ribbon with your image selected, and clicking Reset Picture.
In the example above, a picture of a document has the Set Transparent tool applied to the “white” document background, making it transparent and allowing other objects to show through behind it — such as highlighting.
Crop Image
Easy access to the crop image tool, letting you pull in the edges of an picture (or image of a document) to focus in on a particular region.
Here’s how to install our custom toolbar:
Download the toolbar file here: PowerPoint Toolbar for Attorneys
Open Powerpoint, click the “File” tab, and go to “Options”
Select “Quick Access Toolbar”
Click the “Import/Export” button in the lower right.
Select “Import customizations file”
Select the toolbar file you downloaded.
Encouraged but optional: Check the box “Show Quick Access Toolbar below the Ribbon” — we find the toolbar easier to use when it’s on the bottom.
You should now see the custom toolbar appear below the Ribbon, ready to use.


